Hello lovely people!
Who doesn’t like patio time, right?!
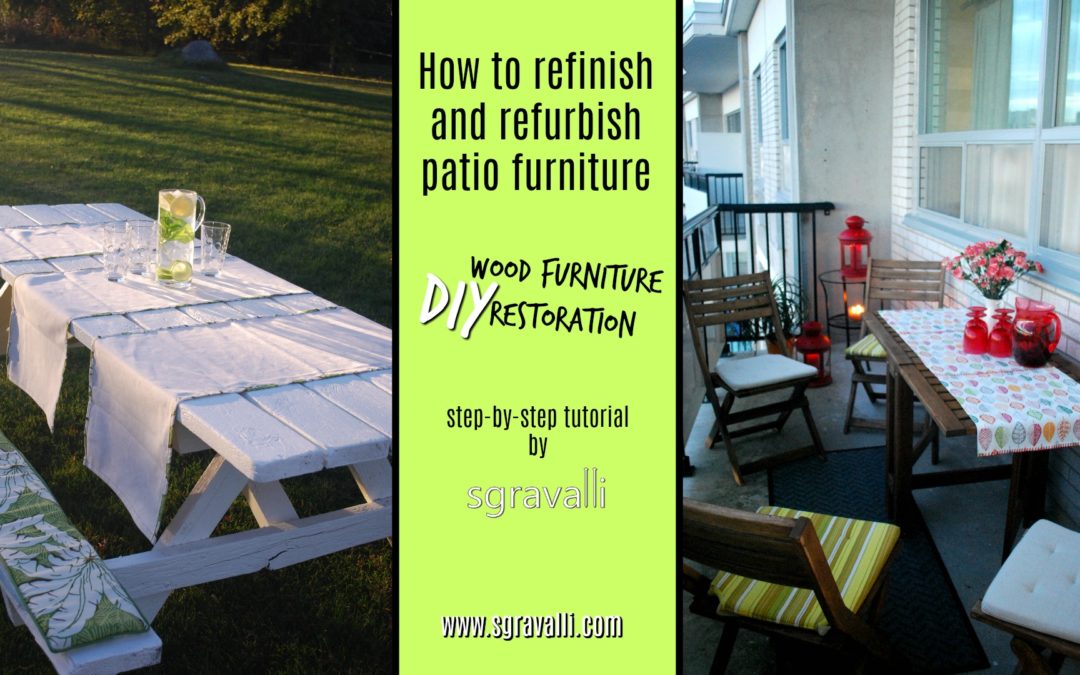
Us, Canadians, simply can’t wait for the patio season to start, and having patio furniture ready within the living space, is almost a must. I hope this episode helped you discover simple ways to refurbish and restore some old wooden patio set that you already have perhaps, weather you choose to finish it with exterior paint or stain. Let my experience guide you with all the additional info right below. Should you have any questions, feel free to write to me via Contact page on this website, or, just leave a comment below.
In this video I promised to leave you a link to some of my other DIY home improvement videos, so here is one on Masterbedroom Makeover (save 35 min for it).
Don`t forget to hit the subscribe button on my YouTube channel, definitely sign up with your email right here and follow me on social media.
Thanks!
Olja
Couple of other important notes related to this video:
1. I had no sponsors whatsoever for executing this project, however, should that change down the road (which would be great because that would mean making more of the helpful videos), I will let you know.
2. I am stressing on this one again; please be safe. I am not a professional at this, it is simply my working experience that I am sharing, so I will not be responsible if you end up injuring yourself trying to do some of the projects described here. Like I did, please inform yourself well from trusted professional sources before embarking onto anything similar. Be smart and safe. And also, have fun!
3. If for whatever reason you would like to read the full script for this video episode, just continue reading, you will find everything down below, grammar mistakes included!
4. To read more about me, other design and DIY ideas, about my fashion jewellery line and many other interesting topics, again check my blog, with all sections available.
5. Statement bracelet I was wearing in this video is one of my designs, you can check what is available at my online store.
6. The entire production of this video is attributed to another passion of mine and it has been executed entirely by me (but no, I am not a professional movie maker). Music and fonts in this video are either royalty free or with purchased license, while all the video footage, photos and all presented designs are mine.
SHOPPING GUIDE:
FABRICLAND – fabric and other sewing supplies
HOME DEPOT – paint, stain, pressure treated wood, new screws, all the tools and the power equipment
WALMART – sewing machine
IKEA – old foldable patio set, chair cushions, patio lanterns
HOME SENSE – table runner for foldable table, food and drink dishes, cookbook
Full transcript of this video
I think it’s this time of the year, when the birds start coming back, when the trees begin to bud, when the cherry blossoms wrap us in its tenderness and colors us in pink, it’s when the green is on the horizon again and the sunshine more present and intense, it’s this time, when, at least us, Canadians, get suuuper excited to urgently forget the long cold months with that S word I can’t even say any more, and go outside and, just, you know, stay there! Patio time and patio furniture comes to mind first, and in this video, this is exactly what we’ll be talking about!
Hi, I’m Olja and I’ll show you how to refurbish old wooden patio furniture two ways, depending on a desired finish to suit your personal preferences. Either way, you will be saving money, saving this planet by choosing eco-friendly approach, and of course, creating something custom, yourself, because you ARE a SuperMasterGenius. By the end of this show, you will learn how easy is to pretty up something you already have, make it safe and functional, durable, comfortable, stylish and just ready to kick off your patio season. As a bonus, I’ll share with you two of my favourite recipes for outdoor summer parties; holy guacamole and most definitely HoLy sangria!
Hey folks, thanks so much for taking the time to watch this video, I’ll do my best to offer you some good tips and design ideas based on my own past experiences, that will hopefully deliver to you, the ultimate pleasure during patio time at your home, weather you live in a house or in the apartment.
If this is the first time you are meeting me, just a quick introduction… I run a blog for home renovators and serious DIYers, and how I got into all this was sort of accidental. Everything started some six years or so ago when I bought my first house, a fixer-upper form the 60-ies, here in Toronto, and also when I lost my marketing job in financial services, just 15 days after that. I ended up designing and renovating my house, with these two hands, out of need rather, which turned into passion and here we are. As a non-professional in this field, I’ve come a long way when comes to designing spaces, actual work for which you’d normally hire a contractor, and my personal favourite, the projects in which I turn something old into something new again, or find a way to reuse things for something they were not meant to be used originally. Kinda our topic today!
You can read more about me and my brand at my website sgravalli.com, I also talk about healthy lifestyle choices there and my fashion jewellery designs just so you know. And, I will also leave you some links of my other how-to videos in the description below, you can check that later.
Now, we are moving on with the refurbishing story. So when I bought that house, with my partner at the time, obviously, the priority was to invest into interior of the house, but with the lush backyard that the house came with, with many mature trees and most precious birdies, it was an imperative to find an inexpensive solution to start enjoying the paradise in the city right away. One day, as I was walking through my new neighborhood, I spotted an old, a atrocious picnic table, taken out to the curb side for a garbage pickup, in front of one huge, just built, brand new house. It was just typical picnic table which you can buy at any hardware store that sells lumber and stuff, BUT, this table looked like it was built looog time ago, with seriously heavy, thick boards, stamped all around with some deep grooves and sharp character. I tried to lift it – barely managed to do it, it was that heavy. OK – that was the moment – I wanted it! Knocked at the door of the castle behind, just to double check if I could take the table, and I got the green light. I got the muscles; I got the heavy duty dolly, navigated like that through the neighborhood and took this baby home.
Before scraping the damaged surface, you do wanna check if the furniture is safe first of all, that nothing is lose, rotten, because if it is, it needs to be addressed first. In this case, the picnic table needed to receive some new legs to stand on and provide more stability overall. And if you’ve never done this before, the solution is simple, just remove the old ones and use those as a guide to cut the new ones, the same goes with purchasing the new screws if needed. For wooden furniture that is to be used outdoor, you are better off going with the pressure treated wood for decking and fencing. Other than legs, my picnic table was in pretty good shape.
And now, the messy part is next. Sanding. Normally you’d be OK to do the sanding with the simple sanding sponge, which I will show you also on another furniture set, however for this guy here and because of its deep rustic marks, I had to use a bit more heavy duty approach, my power drill and the wire brush attachment. Given that this was one of my first DIY projects of the sort, I headed right into it making a rookie mistake: not wearing a protective mask, not wearing gloves, not wearing protective eye wear… OK this one I may pass just because I come with the pair and never without, but YOU MUST WEAR IT. Seriously guys, do not start any project like this before protecting yourself. I learned that lesson fast and I stuck to it. So based on the condition of the wooden surface you need to deal with, choose the appropriate tools, and if you think you’ll need some power tools that you don’t have, you can most probably rent it at one of the big home hardware stores.
Let me show you now the sanding action of this other wooden set. It is the IKEA table and four chairs, years and years old, earning some serious damage from the Canadian winter. This one comes from my previous apartment, and it’s modest in size with all five pieces foldable, which makes it great for living in a small space. Structure wise, still in tip top shape, but the wood had to be revived again. So, instead of spending about $300 for a brand new set of the kind, that’s exactly what I did. Watch closely: I used sanding sponges to sand the table and all the chairs, first I attacked it with the 60 grit sanding sponge to strip it down and than 80 grit sanding sponge to smooth it out. By the time I got to do this project, I was wearing protective clothes and accessories by default.
While doing this, it is important to get into all little corners and gaps not only from the top of the furniture but under it as well. It can get pretty tiring, especially on a hot spring or summer day, so allow yourself some refreshment and cool off time, before you continue.
And I’ll warn you about the one thing, once you’re done sanding, you may go straight into the laundry machine, or, alternatively, you can also burn those clothes… Just joking, but yeah, you’ll get dirty!
Before the wood gets any further treatment, it is important that it gets cleaned off all the dust very well. The simple brush and a wet cloth can be enough, but you can also help yourself with the vacuum cleaner or the high-pressure cleaning gun to really get into the smallest grooves and joints.
Back to the picnic table and the exact same action. Clean-up!
Once you get to this point, know, that much easier and more fun stuff are ahead. You want to protect this newly sanded wood. One way to go is to paint it with the protective EXTERIOR paint. For my picnic table, I opted to go with CIL smart paint and two colors, main one being the “Currier Cream”, and the other one, only for the bench part of the table, the “Century Brown”. Both came in satin finish.
Watch for sunny, calm and without wind weather conditions and start painting from under the table first towards the outside. Read the instructions on the paint can, see what’s the drying time before you are OK to apply the second coat, use that time to make a break, and then press on.
I love this paint, it is so durable, washable, no chips whatsoever. After 2-3 years or so, I only repainted the table top, just to refresh the whiteness that was dirtied by the little weather stains settled deep inside the wood grooves. I didn’t need to sand it again, just scrubbed it and washed it well, and that was it. This table was very well used and enjoyed and I know it’s just a picnic table, but I couldn’t part from it once I had to move. It did compliment one other backyard, standing there so gorgeous in its whiteness against the green grass.
The other way of protecting the wood is by staining it. For my other patio set, I made this choice. I used semi-transparent oil stain for fence, siding and deck, and there are several color shades you can choose from. Before you start, and because the things can get pretty drippy, protect your clothes with something you don’t mind having a stain on. Once, I sewed this super long shirt originally for my beach vacation to serve as a get-lost-skin-cancer shield, which I found more useful for work around the house in the summer time.
OK, when ready, stir the stain with the wooden stick following the instruction on the can. From what I read, it is best to apply the stain out of direct sunlight, however, I have only so much time at my disposal and the space to work at, so I disregarded such instruction for this project. I also did not see any impact on the finished job.
Again, you’ll have to go into all little gaps, approach it from inside and out. Before the second coat, you might wanna give it again, just a light sand, but in any case, follow the instructions on the product packaging. Once the stain soaks in and dries out, it will change a color a bit, turning your patio set into something gorgeous. Transformation is nothing but huge, you save yourself a couple of hundreds dollars and still got brand new stuff!
How could this not make anyone happy?
Sure made me happy, so happy infact that I enjoy both sets today, even more so, I persuaded someone else with the old picnic table to follow my lead! For this one, and because the sitting planks were much narrower than my other picnic table, I offered to make it more comfortable by sewing something soft and stylish, measured exactly to fit this table. And you can do this also on a budget by choosing leftovers of outdoor fabric on clearance, because you only need a little for the seat cushions, some sponge, and whatever little pieces you find on sale for table runners, which you can further turn into a set just by bordering it with the scraps of the cushion fabric. For the two cushions, because they come as long pieces which may be knocked down when attempting to sit at the table, it’s best if you sew in some straps so you can use that to fix the cushions in place. And to make it look more luxurious, you can border those as well, with complementing piping.
There you go, not only does it look cute, but it’s also comfortable, and really brings everyone at the table more closer together, as no other table does. For that, I’ll always be fond of the picnic table. Refreshments are served, party can start!
And if you live in an apartment, as long as you have a balcony, you can enjoy outdoor parties as well, just like I do with my lovely refurbished patio set. Some vibrant fabric to soften the appearance of the wood, few lights here and there, some greenery in a few of the planters, and you are on to create truly romantic and cozy atmosphere.
Also as promised, a quick rundown over two of my favourite recipes originating from this awesome cookbook which I recommend, the recipes which are pretty standard and if you are like me, you might develop a version of your own after making it for a gazillion times. (you must watch the video to follow the recipes)
With this, we are at the end of the show, I hope that you found it useful and inspiring. For more DIY projects and decor ideas, subscribe to my YouTube channel right here, and also, head over to my website at sgravalli.com, leave an email there and never miss anything new I come up with. If you have anything to add or ask, please do, put it all down in the comment box.
And now… I’ll lose myself in sangria and the sunset in my beautiful city of Toronto, grateful that the winter is still faaar away… Until the next time, cheers!